The Ultimate Guide to DIY Cold Plunge: 7 Points to Dive into the Chilly World of Refreshment
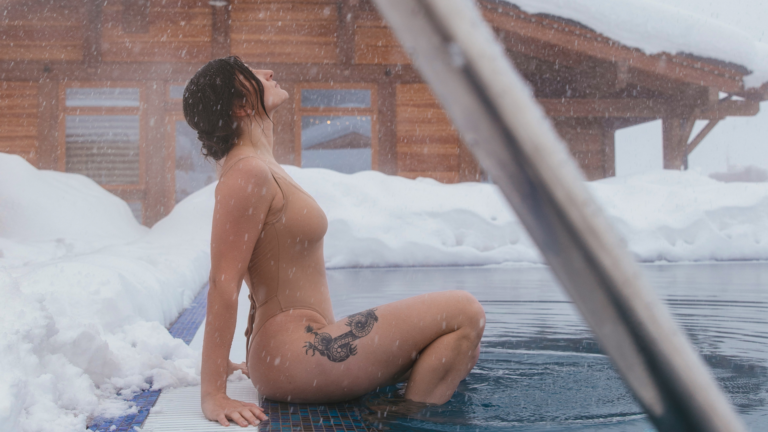
Are you ready to take the plunge into a world of invigoration and health benefits? If so, then look no further than the DIY Cold Plunge! In recent years, cold plunges have gained popularity among health enthusiasts, athletes, and those seeking an adrenaline rush. This thrilling and refreshing practice involves immersing your body in cold water for a brief period, stimulating numerous physical and mental benefits. In this guide, we’ll walk you through the steps of creating your very own DIY cold plunge at home, allowing you to experience the invigorating power of cold water therapy whenever you desire. So, grab your towel and get ready for an exciting journey into the chilly world of rejuvenation!
Table of Contents
7 Points: DIY Cold Plunge
The Science Behind Cold Plunges
Before diving into the world of DIY cold plunges, let’s explore the science behind this chilling practice. When your body is exposed to cold water, it triggers a series of physiological responses. The sudden drop in temperature constricts blood vessels, redirecting the blood flow from your extremities to vital organs to keep them warm. This process, known as vasoconstriction, stimulates the circulatory system, improves blood circulation, and enhances the efficiency of your cardiovascular system.
Additionally, the body’s reaction to cold water immersion prompts the release of endorphins, the feel-good hormones. This surge of endorphins can elevate your mood, reduce stress, and provide a natural energy boost. Moreover, cold plunges also stimulate the activation of brown adipose tissue (BAT), which helps in burning calories and regulating body temperature.
Understanding the science behind cold plunges allows us to appreciate the profound impact they can have on our overall well-being. So, let’s dive into the exciting realm of health benefits that come with taking the plunge!
Health Benefits of Cold Plunges
Engaging in regular cold plunge sessions can offer a multitude of health benefits. Here are some of the remarkable advantages that make this icy practice worth exploring:
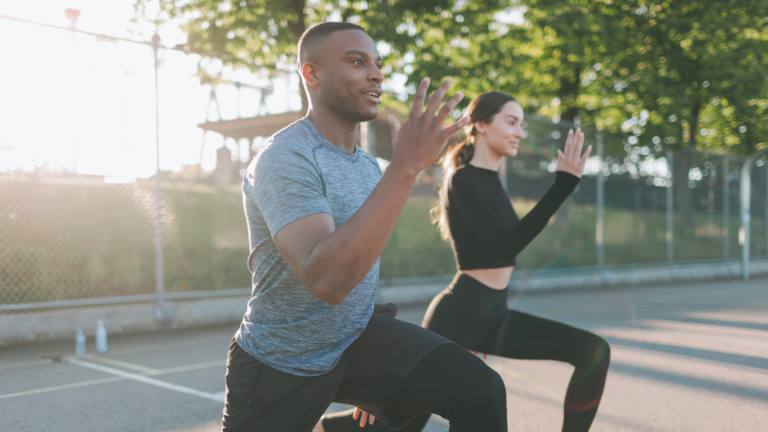
- Enhanced Recovery: Cold plunges are renowned for their ability to speed up recovery after intense workouts. The cold water immersion reduces inflammation, relieves muscle soreness, and assists in flushing out lactic acid, helping athletes and fitness enthusiasts recover faster.
- Increased Circulation: As mentioned earlier, vasoconstriction during cold plunges enhances blood circulation. This improved circulation delivers oxygen and vital nutrients to your muscles, organs, and tissues, promoting their overall health and function.
- Boosted Immunity: Cold water exposure stimulates the production of white blood cells, which are essential for a robust immune system. Regular cold plunges can strengthen your body’s defense mechanisms, making you more resistant to illnesses and infections.
- Improved Mental Well-being: The release of endorphins during a cold plunge can create a sense of euphoria and reduce symptoms of anxiety and depression. Cold water therapy has also been linked to improved focus, mental clarity, and increased resilience to stress.
- Revitalized Skin and Hair: Cold water immersion tightens the skin, minimizes the appearance of pores, and enhances natural radiance. It also promotes hair follicle health and can contribute to shinier, healthier-looking hair.
- Increased Metabolism: Cold plunges activate brown adipose tissue (BAT), also known as brown fat. BAT plays a crucial role in burning calories to generate heat, making cold plunges a potential aid in weight management.
The list of benefits continues, with studies suggesting that cold plunges may even support better sleep, hormone regulation, and improved mood stability. Now that you’re aware of the incredible advantages, let’s proceed with some essential safety precautions to ensure your cold plunge experience is enjoyable and risk-free.
Safety Precautions to Consider
While cold plunges offer a plethora of benefits, it’s important to prioritize safety when engaging in this practice. Here are some precautions to consider before taking the plunge:
- Consult Your Healthcare Provider: If you have any pre-existing medical conditions or concerns, it’s crucial to consult with your healthcare provider before incorporating cold plunges into your routine.
- Start Slowly: If you’re new to cold water therapy, gradually acclimate your body to the cold temperatures. Begin with shorter immersion periods and slowly increase the duration over time.
- Never Plunge Alone: It’s advisable to have someone nearby when you’re taking a cold plunge, especially if you’re immersing yourself in a container without a proper ladder or steps for easy exit.
- Avoid Extremely Cold Water: Extremely cold water can be dangerous and lead to hypothermia. It’s essential to maintain a safe water temperature that suits your comfort level.
- Know Your Limits: Pay attention to your body’s signals and respect your limits. If you feel dizzy, lightheaded, or experience any discomfort, exit the cold plunge immediately.
- Warm-Up Post-Plunge: After your cold plunge, warm up gradually to avoid shock to your system. Bundle up in warm clothes, wrap yourself in a cozy blanket, or enjoy a warm beverage.
By following these safety precautions, you can maximize the benefits of cold plunges while minimizing potential risks. Now that we’ve covered the safety aspect, let’s move on to setting up your very own DIY cold plunge!
Setting Up Your DIY Cold Plunge
Creating your DIY cold plunge at home is an exciting and fulfilling project. Here are the essential steps to get you started:
- Choosing the Right Container: Depending on the available space and your personal preferences, you can select various containers for your cold plunge. Options include bathtubs, stock tanks, or even repurposed large containers like old wine barrels or horse troughs.
- Determining the Ideal Temperature: While some prefer ice-cold plunges, it’s crucial to find a temperature that suits your comfort level. Aim for a range between 45°F (7°C) and 60°F (15°C). You can use a thermometer to monitor and adjust the water temperature accordingly.
- Adding Cold Water Techniques: Maintaining the desired water temperature in your cold plunge may require additional techniques. You can add ice cubes, use a submersible water chiller, or connect your plunge container to a recirculation system for continuous cooling.
Once you’ve set up your DIY cold plunge, you can customize your experience to make it even more enjoyable and rejuvenating.
Enhancing Your Cold Plunge Experience
To make your cold plunge sessions more relaxing and invigorating, consider the following enhancements:
- Using Aromatherapy: Add a few drops of essential oils, such as eucalyptus or peppermint, to the cold water. The aromatic experience can elevate your senses and enhance the overall relaxation.
- Incorporating Cold Plunge Rituals: Create a ritual around your cold plunge sessions. This could involve deep breathing exercises, meditation, or visualization techniques to help you relax and focus during the immersion.
Remember to always listen to your body and customize your cold plunge experience to suit your preferences.
Maintenance and Cleaning Tips
To ensure the longevity and cleanliness of your DIY cold plunge, it’s important to follow proper maintenance and cleaning practices. Here are a few tips:
- Regularly clean the container: Drain and clean your cold plunge regularly to prevent the buildup of algae, bacteria, and other contaminants. Use a mild cleaning solution and scrub the walls and floor of the container. Rinse thoroughly before refilling.
- Check the water quality: Test the water regularly to ensure it remains clean and balanced. Use appropriate water testing kits to monitor pH levels, chlorine levels (if applicable), and overall water quality. Make any necessary adjustments to maintain optimal water conditions.
- Inspect and maintain equipment: If you’re using additional equipment such as water chillers or recirculation systems, inspect them regularly to ensure they are functioning properly. Clean or replace filters as needed and address any issues promptly.
- Monitor water temperature: Keep an eye on the water temperature and adjust as necessary to maintain your desired range. This may involve adding ice, adjusting the chiller settings, or making changes to the recirculation system.
By implementing these maintenance and cleaning practices, you can enjoy a clean and refreshing DIY cold plunge experience for a long time to come.
Frequently Asked Questions (FAQs)
Q1: How long should I stay in a cold plunge?
A: The duration of your cold plunge can vary depending on your tolerance and experience. It’s generally recommended to start with shorter durations, around 1-3 minutes, and gradually increase the time up to 10 minutes or as comfortable for you.
Q2: Can I take a cold plunge if I have a heart condition?
A: If you have a heart condition or any concerns, it’s essential to consult your healthcare provider before engaging in cold water therapy. They can provide personalized advice based on your specific health situation.
Q3: Are there any specific times of the day that are better for cold plunges?
A: There isn’t a specific time that is considered better for cold plunges. It’s a personal preference. Some people enjoy them in the morning to invigorate and start their day, while others prefer them in the evening to promote relaxation before bed.
Q4: Can I take a cold plunge during pregnancy?
A: Cold plunges are not recommended during pregnancy due to the potential risks of sudden temperature changes and vasoconstriction. It’s always best to consult with your healthcare provider for guidance.
Q5: Are there any alternatives if I don’t have enough space for a cold plunge at home?
A: If space is a limitation, you can explore alternatives such as cold showers, plunging your limbs into buckets of cold water, or visiting local facilities that offer cold plunge experiences.
Remember, these are general answers, and individual circumstances may vary. It’s always advisable to seek professional guidance or consult with a healthcare provider for personalized advice.
DIY Cold Plunge Conclusion
Congratulations! You’ve now discovered the exhilarating world of DIY cold plunges. By creating your own cold plunge at home, you can experience the invigorating and numerous health benefits that come with this practice. Remember to prioritize safety, start slowly, and customize your experience to suit your preferences. Whether you’re an athlete looking for faster recovery, someone seeking mental clarity, or simply craving a refreshing experience, the DIY cold plunge can be a fantastic addition to your wellness routine. So, take the plunge, embrace the chill, and unlock a new level of rejuvenation and vitality!